Tuesday, 12 September 2017

5 Mistakes Pre-K Teachers Make the First Week of School

There are 5 mistakes Pre-K teachers typically make in the first week of school. After years of trial and error, I now avoid doing these five things.
We preschool teachers typically do these things because it’s tradition, or it’s cute, or because Kindergarten and First Grade teachers do it (and we want to do it, too). This is all simply my opinion, and I know there are Pre-K teachers who will vehemently disagree with what I’m about to say, and that’s okay. I also know there are teachers who will find it refreshing to think, maybe I don’t have to do that school tradition any more.
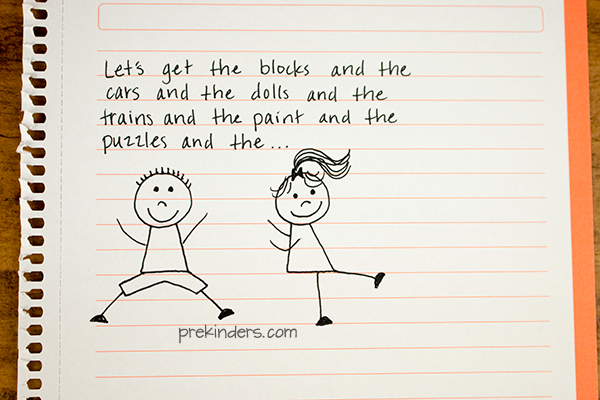
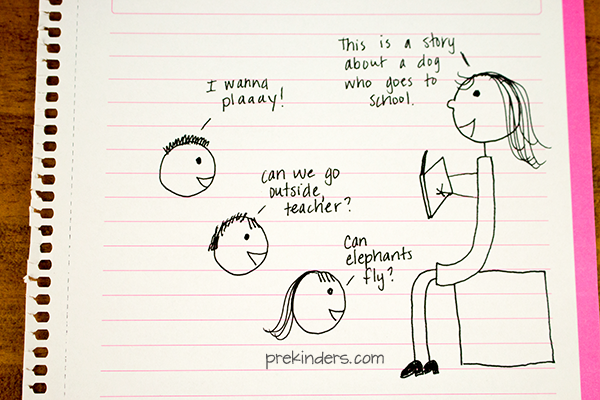
As a bonus (or not), I’ve provided some terrible, very lame stick figure cartoons for your amusement (using the term amusement lightly). In other words, I couldn’t afford to hire a real artist. ðŸ™‚
5 Mistakes Pre-K Teachers Make the First Week of School
BY  

1. Reading the wrong books the first week of school.

What do most early childhood teachers read the first day of school, the first week of school? It’s usually The Kissing Hand, or any book about going to school. It’s so cute, it’s so traditional to read this book the first day of school. Every teacher reads it, right?
I do not. The reason why? The book is too long for preschoolers’ very, very short attention spans (at least at the beginning of the year). I choose to read books that are short, fun, and very engaging. If there’s humor, even better. My favorite first day of school book is What Color is Your Underwear?, which is unfortunately out of print. (I would have thought my class could have single-handedly kept this book in print because I’ve bought so many copies.) The first week of school, we also read The Very Hungry Caterpillar, The Lady with the Alligator Purse, and the funny books by Jan Thomas.
Remember: Don’t think you have to read a book the first week of school just because it’s a book about school. Read books that are short, engaging, fun, and funny, and your first day will rock.

2. Going on a school tour.

Yes, I know what teachers who believe in school tours on the first day will say: It’s tradition! The kids love it! The kids need to tour their school so they know where everything is and who all the people are! Tours are cute because the kids find the gingerbread man/brown bear/etc. I used to do a school tour each year for those reasons. I stopped doing tours when I finally realized the only thing I succeeding in doing was making myself crazy and stressed.
Here’s the thing. Pre-K kids do not know how to walk in line or stay with the class or be quiet in the hall yet. The first day is stressful enough. Do you really want to do this?
Preschoolers don’t need to see the whole school the first day. Unlike older children, there won’t be a time when they will need to walk to the gym, library, or cafeteria by themselves. When they go anywhere in the school, they will be with you or other school personnel. They can see all of these school places and people when they need to go there the first time.

3. Teaching an apple theme the first week.

Do not teach any theme the first week — teach procedures instead! Pre-K kids don’t need to make apple prints with paint the first week, they need to learn procedures for using paint and cleaning it up. Forget the apple science experiments, instead teach them how to live in a classroom with lots of other children. My first week lessons are all about how to line up, how to sit at circle time, how to close the marker caps, how to use glue, how to use scissors, how to clean up the blocks, how to treat the books. If you spend this valuable time teaching apples instead of procedures, you will live to regret it.

4. Forgetting where they come from.

Remember that these children have only been alive for 4 years. Really think about that — only four. While some children may have come from a preschool or childcare setting, for many children, this will be their first ever experience in school.
You have to teach them everything, even the most basic things, like clicking marker caps, walking in line, staying in their seat at lunch. You will have to teach them how to use manners, show respect, keep their hands to themselves. This will be the first day that many will be in a structured environment. The first day they don’t get to watch TV whenever they choose. The first time they have to line up on the playground when the teacher calls them inside. The first time they don’t drink out of a sippy cup. The first time they hold a pair of scissors.
You will have to teach them to flush the toilet, wash their hands, and what not to do in a bathroom urinal. There’s so much for them to learn this first week of school! Remember they will not come to you knowing these things because this is their first time in school.

5. Giving them too much too soon.

For the first week of school, limit the amount of materials and toys that are available to the kids. Too many will overwhelm children. Introduce most items to the class before placing it out for them to use. For example, I do not have dry erase boards and markers available until I show the class how to use them. Stick with basic materials and limit what you have either by putting some materials away in a closet or hiding them. Many teachers don’t have the extra storage space the put some things away, and in that case, you can turn some of your shelves around facing the wall, or cover some shelves with fabric or plastic table cloths, or wrap some items like a gift to be opened later. Most preschool classrooms are the ultimate playroom because we have so much available to the kids, but at the beginning, that can be overwhelming to children who are new to a school setting.

While I know some teachers won’t agree with me (and I may have stepped on some toes), these are five things I’ve learned to avoid the first week of school. Avoiding these help me have a less stressful start to the school year.

Tuesday, 5 September 2017

Five ways to save for your child's education – other than RESPs

PHOTOS.COM                                              Save for a child’s university or college costs through RESPs.
by 
Most Canadian parents know about RESPs (which doesn't necessarily mean they have them) but few are aware of alternative ways of saving for their child's post-secondary education, says a new report.
The report, released Wednesday by the Bank of Montreal, says a study conducted last year found that 83 per cent of parents expect to pay for their child's college or university costs, while 44 per cent expect their child will also chip in.
It's no surprise that parents want to help. With tuition costs soaring and the job market looking bleak, today's young adults are more likely than ever to finish post-secondary school burdened with significant amounts of debt. Spending years repaying that student debt will in turn hurt their ability to save for things like getting married, buying their first home, and starting a family.
According to one estimate, Canadians leave school with an average student debt of $27,000. "Currently, a four-year university degree can be expected to cost upwards of $60,000," the BMO report said. "That sum could rise to more than $140,000 for a child born this year."
RESPs (registered education savings plans), which have been around in their current form since 1998, are the most popular way for parents to save for their kid's higher education. Money placed into these investment accounts can grow tax-free. Through the Canada Education Savings Grant, the federal government provides a 20-per-cent grant on RESP contributions of up to $2,500 a year.
However, the BMO report says that while half of Canadian parents use RESPs, only 34 per cent are taking full advantage of this government grant. It also found that parents wait too long to start saving, do not save consistently enough, and are not familiar enough with the legal and tax implications of using these accounts.
Rona Birenbaum, an independent financial planner at Caring for Clients in Toronto, says the parents she talks to are "most definitely" concerned about saving for their children's higher education. She encourages parents to maximize their RESPs and get the 20 per cent government grant. "This is free money the government is giving parents to help fund their kids' school."
However, most of the parents she meets are too financially strapped with repaying debt, paying off their mortgages, saving for retirement and covering everyday expenses to be able to do much else. "I don't see that many that have the capacity to save beyond that annual RESP maximum, which is $2,500 per child per year," Ms. Birenbaum says. "The five alternatives offered below are for people who have spare money lying around and are looking for tax-efficient ways to save for this."
Even parents who contribute the maximum amount to an RESP for the required 17 years are going to find that they need extra money to cover the costs of a higher education, especially if the child goes away to school, Ms. Birenbaum says. She encourages parents to get kids involved in saving for their own education through summer and part-time jobs.
For parents who are maximizing their RESP contributions and looking for other ways to save, the BMO report offered these five options:
1) Open a non-registered accountThe benefits of opening a non-registered account specifically for the purpose of saving for your kid's schooling is that it is easy to set up, simple to understand and offers flexibility, the BMO report says. You can withdraw the funds for whatever reason at any time, and retain control of them after your child reaches the age of majority. The downsides are the temptation to use these funds for something other than your child's education, as well as that the parents will be taxed on all the income and any capital gains.
2) Use a Tax-Free Savings Account (TFSA)By putting money into a TFSA, parents' savings will grow tax-free and the money can be easily withdrawn in the future to help finance a child's education, without having to pay taxes, the BMO report says.
3) Set up a trustA trust, a legal agreement where money is transferred from one person to another according to specific terms, is a good way to "manage, control and protect funds" because it gives a parent – or grandparent – the peace of mind of knowing that the money will be used for its intended purpose, the BMO report says. It is important to set up the trust properly with a written agreement that outlines terms and conditions, it added, noting that there are also tax consequences to consider, depending on how the trust is funded.
4) Pay out corporate dividendsIf you are incorporated or have an incorporated family business, you could build up savings in your corporate account and pay them out in the form of a corporate dividend at a later date to pay for your child's education, the BMO report says. Your child would need to own shares of your company. The benefit of this is that the dividends will be taxed in the hands of your child, who will presumably have a low income, it added.
5) Get life insuranceParents or grandparents can use life insurance to fund their child's or grandchild's post-secondary education by building up and then tapping into the excess cash value within an insurance policy, the BMO report says. The benefit of this strategy is that the growth would be tax-deferred inside the policy, it says, while it is building while the downside is that the parents or grandparents will lose control over the money put into the policy and the coverage offered by the contract.
Mike Holman, the author of The RESP Book and the Money Smarts blog, dismissed the idea of saving for a child's education through life insurance. "That's a really expensive way to save for anything," he says, pointing to the high fees and commissions associated with this method.
He was also critical of the trust option, noting that the child could choose to use their education money for other purposes. "At age 18, one might be tempted to buy a new corvette rather than go to school. I know I would have," he joked.

Getting your little one ready for their first day at school

@BountyUK
The first day can be a challenge – and that’s just for you! Here’s some advice on helping your little one settle in at school.
Needless to say you will have all uniform laid out the night before, everyone will be up and ready 10 minutes early and there will be absolutely no last-minute panics, crying or even lumps in throats.

Get organised

Back in the real world... A bit of pre-organisation will definitely help things go more smoothly on the first day (don’t forget to leave a few minutes for doorstep pictures), but it’s best not to aim for perfection. You don’t want to pass on any stress you’re feeling to your little one, who will naturally feel a bit anxious. The mood you want to convey is calm, efficient and positive, but not too manically eager.

Be prepared for clinginess

Even if they've been to nursery/pre-school and are used to being away from you, be prepared for a bit of clinginess. There’s something very big and real about school, and it feels different from nursery. Some kids are settled in a week, others take most of the first term or even longer. They’re all individuals, but they’ll get there in the end.
When you drop them off, tell them what you’ll be doing that day (the duller the better) and re-iterate when you’ll be picking them up. Don’t appear rushed but say your goodbyes cheerfully but quite decisively (give them kiss for their pocket, or a tissue with your perfume on). Then guide them in. Try to keep any tears in check until you walk away from the door – you won’t be the only one with a lump in your throat.
Afterwards, you could take them to the park for a low-key treat or make their favourite tea. Most mums who've been through this stage advise not too many playdates in the first few weeks as they’re so exhausted.

At the end of the first day

That evening, try to resist the temptation to grill them about their day. It may be a couple of weeks before you get any sensible information out of them. Rather than say, ‘what did you do at school today?’ which rather invites the answer ‘nothing’, try ‘what was the best thing that happened today?’ or ‘did you play football/mummies and daddies at play time?’ Later on, playdates can be great sources of information: just eavesdrop at the tea table for an in-depth report.

Get to know the teacher

Talk to the teacher if you have concerns they’re not settling within a few weeks. This can be daunting to new parents as the school set-up feels more formal than nursery, and there are 29 other parents all trying to get a word in. Best not to collar the teacher first thing in the morning when they have 30 children to settle; try at pick-up time or make an appointment for another day.
Keeping on friendly terms with the teacher is really important – you’ll have to face them all year (and perhaps again with younger siblings). Lots of smiles and politeness are the order of the day, as well as saying thanks when something has gone well.

Help them do well at school

We all want our little ones to do well in life, and that means getting the most out of their school years.
That doesn't mean we have to hothouse them with extra lessons and weekend workbooks (this can actually have the opposite effect in the end unless they’re really keen).
Let your little one know you think school is important. Research shows that a parent’s interest in a child’s education is the biggest indicator of their future success. Ask them questions about their friends, work and teachers and make sure they’re there on time in the morning, having had a good breakfast.
They’ll probably need a bit more sleep than usual (possibly 12-13 hours) in the first term. Set aside time for homework and make sure you've got somewhere they can do it.

Learning during the first year

There’s a lot of learning through play in the first year, so it shouldn't feel too different from pre-school/nursery – although most schools start teaching phonics/reading as soon as they arrive.
A great way to help your little one stay interested in school is to pick up on any topics they’re studying – dinosaurs, minibeasts or whatever – and arrange weekend family trips to museums or to the park to collect bugs. Take pictures so your child can be the star of Monday morning’s show and tell.
For more information and advice and to see what other mums say about settling your child at primary school, visit the Bounty Toddler Community

Sunday, 23 July 2017

ART PROJECT: Beach Drawing


DrawingHow to Draw TutorialsKindergarten


A little first grader made this beach drawing years ago. I love everything about it.
I thought it was time for a tutorial as it makes for a fun drawing this time of year. The download is available after you subscribe to my email list (to get MORE freebies).
P.S. Not to worry if you have already subscribed, the system will not duplicate your address. Enjoy!
MATERIALS
• Drawing paper
• Black Sharpie marker
• Crayons

The do’s and don’ts of reading aloud to young children

Today in our ongoing book study of “The Read-Aloud Handbook” by Jim Trelease, I have the pleasure of sharing chapter 4 with you which is titled “The Do’s and Don’ts of Read-Alouds”…
Chapter 4 is a list of Do’s and Don’ts that cover a broad range of ages and stages in the read-aloud experience so for the purpose of this post, I have selected a few of the points that I think are the most relevant to those of us reading to young children. Be sure to note that I am only highlighting some of the tips shared in the book today…
Do…
  • Begin reading to children as soon as possible. The younger you start them, the easier it is.
  • Choose books for infants and toddlers that include rhymes, songs, and repetition to stimulate language and listening.
  • Read as often as you and the child have time for.
  • Start with pictures books with only a few words on the page then gradually move on to books with more and more text and fewer pictures.
  • Before you begin to read, always say the name of the book and introduce the author and illustrator, no matter how many times you have read the book.
  • The first time you read the book, discuss the illustrations on the cover of the book and ask the child(ren) what they think the book will be about.
  • Occasionally, read above children’s intellectual levels and challenge their minds.
  • Allow your listeners a few minutes to settle down and adjust their minds and bodies to the story.
  • Mood is an important factor in listening. The authoratative, “Now stop that and settle down! Sit up stratight! Pay attention!” doesn’t create a receptive atmosphere.
  • When reading a picture book, make sure the children can easily see the pictures.
  • Remember, reading aloud comes naturally to very few people. To do it successfully and with ease, you must practice.
  • The most common mistake in reading aloud is reading too fast. Read slowly enough for the child to build mental pictures of what he just heard you read.
  • Slow down enough for the children to see the pictures without feeling hurried. Reading quickly allows no time for the reader to use vocal expression.
  • Preview the book before reading it aloud to your children. This will allow you to know ahead of time if there is any part of the book you want to shorten, eliminate, or elaborate on.

  • Add a third dimension to the book whenever possible. For example, have a bowl of blueberries ready to be eaten during or after the reading of Robert McCloskey’s Blueberries for Sal or a harmonica and lemon available before reading McCloskey’s Lentil.
  • Chart your reading experiences by creating a chart for the wall and adding caterpillars, worms, trains, and other pictures to represent each book so the children can see how many books have been read together.
  • Reluctant readers often find it hard to sit still so try giving them a pencil and paper during the read-aloud experience to keep hands busy. You doodle while talking on the telephone don’t you?”

  • Arrange time in the classroom or at home for the child(ren) to read on their own even if it means only turning pages and looking at pictures.
  • When a child wishes to read to you it is better to choose a book that is too easy rather than too hard.
  • Encourage older children to read to younger children.

Enjoying the tips so far? Now let’s take a look at a few of the Don’ts!


Don’t…
  • Don’t read stories you don’t enjoy yourself. Your dislike will show up in your reading and that defeats your purpose.
  • Don’t keep reading a book once it is obvious it was a poor choice. Admit the mistake and choose another. Make sure, however, that you give the book a fair chance to get rolling. There are some books that just start off slow and get better but you can avoid this all together by prereading the book yourself before reading it to your children.
  • Don’t feel like you have to tie every book you read to class work.
  • Don’t overwhelm the listener. Make sure the book you read is appropriate for the intellectual, social, and emotional level of the children you are reading to.
  • Don’t get too comfortable while reading. A slouching or reclining position is likely to make you drowsy.
  • Don’t impose your interpretation of a reading onto your children. A story can be just plain enjoyable, no reason necessary, and still give you plenty to talk about.
  • Don’t confuse quantity with quality.
  • Don’t use the book as a threat (to get the child(ren) to do or not to do something). As soon as your child or class sees that you have turned the book into a weapon, they will change their attitudes about books from positive to negative.
     
I hope you are enjoying our study of The Read-Aloud Handbook: Seventh Edition by Jim Trelease!
Stay tuned for Chapter 5: Silent Sustained Reading; Read Alouds Natural Partner brought to you by Scott Wiley of Brick by Brick – July 22, 2013! 
More from our book study
Join us for more great tips and information on how reading aloud to young children is an important part of developing a promising reader for the rest of his life!  To join us simply visit this post for the entire schedule of posts or check out the linky below!
Available on Amazon

Thursday, 6 July 2017

A lesson in color mixing

by Deborah Stewart 
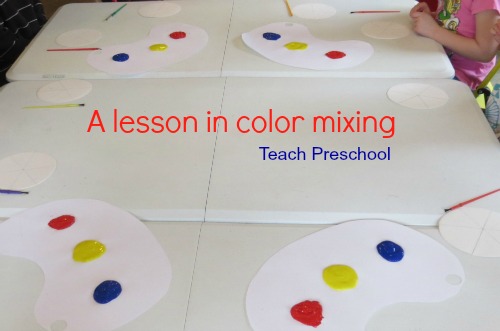
All through out the year, I give my students lots of opportunities for exploring concepts such as color mixing but along with the freedom to independently explore, I will often take the time to sit down with my students and walk through a concept. This lesson in color mixing is an example of such a time…


Anytime there is a process that I want to guide my students through, I find it best if I really think through what approach will work the best. Will it be better to add a dot of color on each circle graph or leave the graph blank? Will it be better to prepare the colors of paint ahead of time or invite the children to add their own colors? Will it be better to use one brush with a cup of water or lots of brushes and no water?  Will my students find “Plan A” more  interesting and easy to understand or should I go with “Plan B?” What kind of information do I really expect my students to walk away with and remember?..


As much as I think ahead, I almost always find that something doesn’t go as planned and so regardless of the plan I choose to go with, I know that it is important to remain flexible and not get too focused on the “lesson” but to instead stay focused on the purpose. Ultimately, the purpose in this lesson was to break down the process of color mixing and to open up discussion that promotes critical thinking and inquiry. We began by asking questions like “What do you think will happen if we mix red with blue ?” and then we searched for answers…


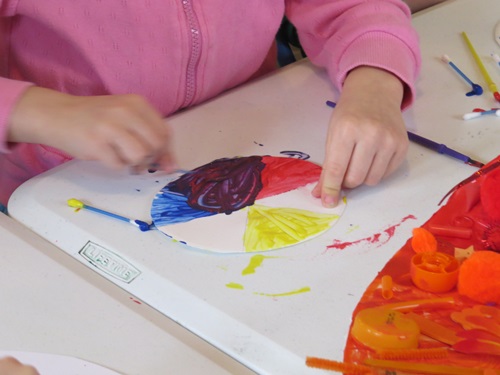
In this type of lesson, I guide my students through the steps to answer our questions. We began by painting red on one triangle then moved on to painting a second triangle with the yellow…


In my mind, each child would skip a space in the color wheel to paint the two colors but my first error in planning showed up right away. The children went off in different directions with the two colors. Some painted side-by-side, some painted with the yellow right on top of the red, and others skipped a space. Did that mean this lesson was a fail? As Pete the Cat might say say, “Goodness No!” Colors come and colors go – so we just kept on plugging along….


Our oldest students began to catch on to how to apply and mix the paint on the color wheel so that they would be able to see every color on their wheel where our youngest students got a little confused about the idea of spacing out their colors. But the lesson still was a success as the children worked to intentionally select two different colors  and mix them together to make a third color…


And along the way, I realized that it was best for the children to use different paint brushes so that their colors would not get so muffed up on the brushes. So at the very last minute, we pulled out cotton swabs to use for mixing our colors…


I am sure you have had a lesson where the plan didn’t quite go as you had originally thought. Did you make an adjustment? Did you scrap the idea altogether? Want to tell me about it?  Leave a comment below and we will continue this discussion…

Available on Amazon

12-Year-old Saves Friend’s Leg Using First Aid From ‘Hunger Games’ Book

by McKinley Corbley
A 12-year-old girl is being hailed as a hero after she used a first aid technique that she learned from reading The Hunger Games series to help treat her friend’s leg injury.

Megan Gething, Mackenzie George, and several of their other friends were playing in a Gloucester, Massachusetts marsh on Saturday morning when Mackenzie slipped through the mud and slashed her leg open on a piece of steel.

The wound, which was about 10 inches long and 3 inches wide, started bleeding profusely, sending the youngsters into a state of panic – except for Megan.
RELATED: 12-Year-old Girl Outsmarts Carjacker and Saves Little Sister

Remembering a scene in the Suzanne Collins novel, Megan quickly requested a pair of her friend’s shorts so she could tie a tourniquet on Mackenzie’s leg. As she applied pressure on the tourniquet, she calmly told one of the other teens to run and get help.

“I knew it from a book I read,” she told the Gloucester Times, referencing the young adult book series. “I figured it was a well-known method of stopping bleeding.”

Mackenzie’s family members arrived a few minutes later and carried the injured youth back to their home where she was taken to the local hospital. She then underwent surgery to make sure that there was no bacteria in the wound. Since the injury caused no nerve or muscle damage, Mackenzie is expected to make a full recovery by the end of the month.

Paramedics say that the situation could have been much worse if Mackenzie had continued to lose blood – and it’s all thanks to Megan’s quick-thinking under pressure.


“Megan was the star of the show. Thank goodness she was there. Mackenzie would have lost a lot more blood, and it could have been life-threatening if she hadn’t done what she did,” the youth’s father told the Gloucester Times.